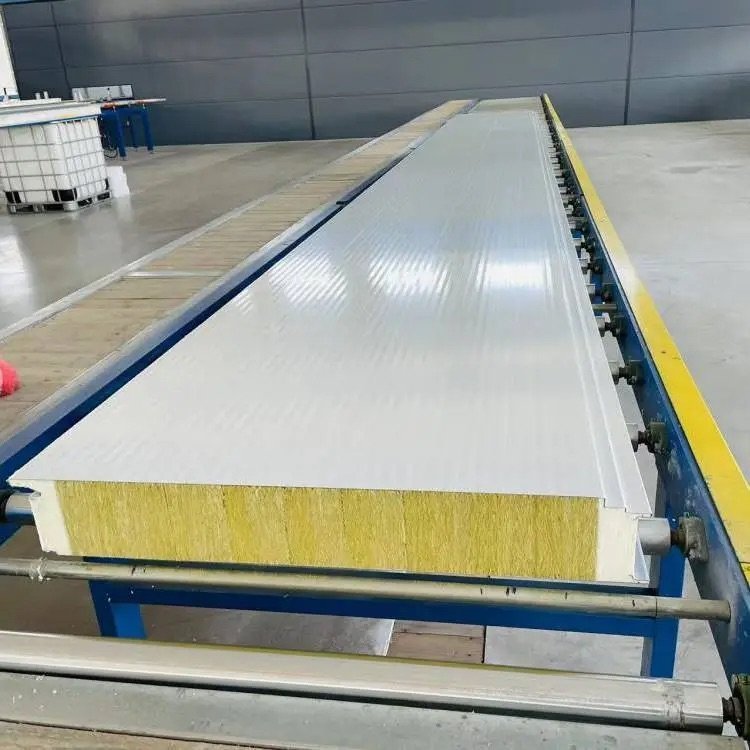
Sandwich panels are smart building materials that you can make sandwich panel from. They feature a light core situated between two strong outer layers. These panels are not only strong but also effective at keeping heat in or out, all while being lightweight. They are commonly used for walls, roofs, and cold storage due to their durability and energy-saving properties.
In today’s construction landscape, sandwich panels are extremely important. In 2023, the market for these panels was valued at $10 billion, and it is projected to grow to $18 billion by 2032. This trend indicates a rising demand for sandwich panels, particularly for insulation purposes. To effectively incorporate sandwich panels into your projects, it is essential to understand their uses and benefits.
Key Takeaways
Sandwich panels are light, strong, and keep heat or cold in. They are great for building and transport uses.
Use good materials like metal sheets for the outside. For the inside, use polyurethane or mineral wool for strength and insulation.
Follow these steps: cut the materials, add glue, press layers together, and let them dry to make strong panels.
Pick a production method based on project size. Continuous is quicker for big jobs, while discontinuous is better for custom work.
Test the panels often for strength, insulation, and quality. This ensures they are safe and work well.
Materials and Tools to Make Sandwich Panel

To create a sandwich panel, you need proper materials and tools. Each part is important for strength, insulation, and durability.
Core Materials
Outer Layers
The outer layers protect the sandwich panel. Common materials include:
Metal Sheets: Light and rust-proof, great for outdoor use.
Aluminum: Strong and rust-resistant, often used in modern buildings.
Steel: Very strong, perfect for factories and industrial areas.
Core Materials
The core affects insulation and structure. Here are common cores:
Core Material | Benefits | Uses |
|---|---|---|
Mineral Wool | Fireproof, blocks sound | Factories, schools, and hospitals |
Polyurethane (PUR) | Keeps heat in or out, very light | Cold storage and fridges |
Polystyrene (EPS/XPS) | Cheap, decent insulation | Homes and offices |
Polyisocyanurate (PIR) | Good insulation, fire-resistant | Special projects needing safety standards |
Phenolic Foam | Insulates well, resists fire | Unique uses in building panels |
For example, polyurethane panels are common in cold storage because they insulate well and are light.
Tools and Equipment
Cutting Tools
Cutting tools shape the outer layers and cores. Examples are:
Circular Saws: Best for cutting metal sheets.
Hot Wire Cutters: Great for shaping foam cores like polystyrene.
Adhesive Application Tools
Adhesives stick the core to the outer layers. Tools include:
Spray Guns: Spread adhesive evenly on large areas.
Rollers: Handy for small, manual adhesive jobs.
Pressing and Curing Equipment
Pressing secures layers, and curing makes them stable. Use:
Hydraulic Presses: Apply even pressure for strong bonds.
Curing Chambers: Control heat and moisture for proper setting.
Industry Trends in Materials and Tools
New ideas have improved materials and tools for sandwich panels. For example:
Trend Type | Details |
|---|---|
Better Core Materials | |
Smart Technology Use | Sensors check panel strength and energy-saving features. |
Green Production Methods | Using eco-materials and saving energy supports global green goals. |
These changes make panels work better and help the environment too.
Step-by-Step Process to Make Sandwich Panel
Material Preparation
Cutting and Shaping the Outer Layers
First, cut the outer layers to the needed size. Use tools like circular saws for cutting metal or aluminum sheets. Make sure the edges are smooth and clean. This helps the layers fit well during assembly. Measure carefully before cutting to avoid wasting materials.
Preparing the Core Material
Next, get the core material ready. If using foam, like polyurethane, shape it with a hot wire cutter. For mineral wool, cut it into even pieces. Keep the core clean and free of dust. This step is important for a strong bond during assembly.
Core Processing
Applying Adhesive to the Core
Spread adhesive evenly on the core’s surface. Use a spray gun for big panels or a roller for smaller ones. Make sure the adhesive layer is smooth and even. Follow the instructions for how thick to apply and how long to let it dry.
Aligning the Core with the Outer Layers
Place the core between the two outer layers carefully. Line up all edges so the panel is even. Misaligned edges can make the panel weak. Take your time to ensure everything is straight and secure.
Lamination and Bonding
Pressing the Layers Together
Put the panel into a hydraulic press. Apply steady pressure to stick the layers together. This step spreads the adhesive evenly and makes the panel strong.
Ensuring Even Distribution of Adhesive
Check the adhesive during pressing to make sure it spreads evenly. Uneven adhesive can cause weak spots or peeling later. Use quality checks to confirm the bonding is solid. This step ensures the panel is strong and insulates well.
Tip: Work in a space with steady temperature and humidity. This helps make better panels and improves the final product’s quality.
Curing and Cooling
Letting the Adhesive Dry
After pressing the layers, let the adhesive dry fully. This step is key for a strong bond between the core and outer layers. Check the adhesive instructions for drying time. Most adhesives need a few hours to dry. During this time, do not move or touch the panel. Keep the area steady with the same temperature and humidity. This helps the adhesive dry evenly.
Cooling the Panel for Strength
Once the adhesive dries, cool the panel to make it strong. Cooling helps the materials settle and hold their shape. Use slow cooling to avoid bending or uneven shrinking. For polyurethane panels, cooling slowly keeps their insulation working well. After cooling, the panel is ready for the next steps.
Finishing
Cutting Extra Material
Check the panel edges for extra material. Use tools like a saw or knife to cut off the extra parts. Cutting makes the edges smooth and neat for easy installation. Measure the panel again after cutting to ensure the size is correct.
Checking for Problems
Before finishing, check the panel for problems. Look for uneven glue, crooked layers, or surface flaws. Inspect by eye or use tools to test strength and insulation. Fix any issues right away to meet quality standards. This step ensures the panels are strong and ready to use.
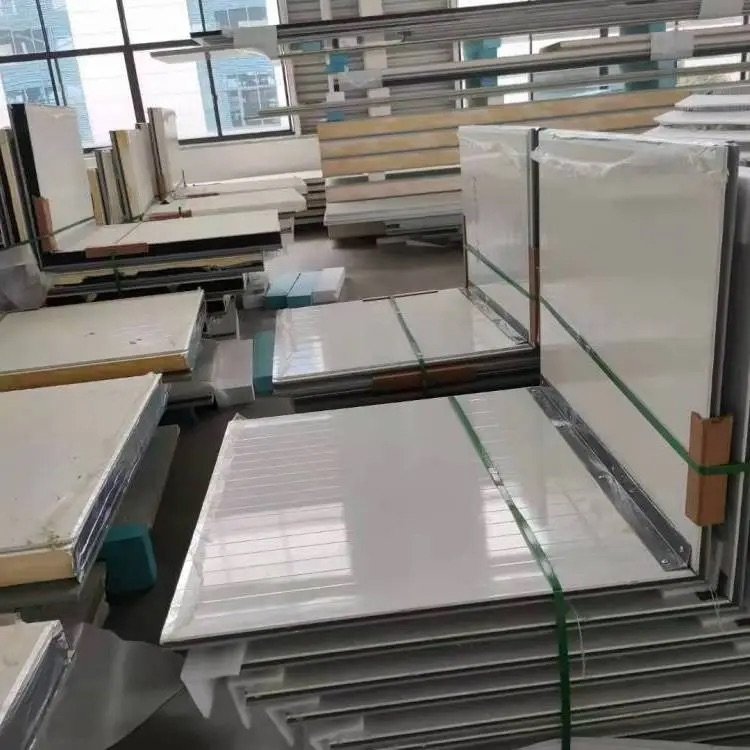
Tip: Store finished panels in a clean, dry place. This keeps them safe from water or damage before use.
Production Methods for Sandwich Panels
Continuous Production Method
How Continuous Production Works
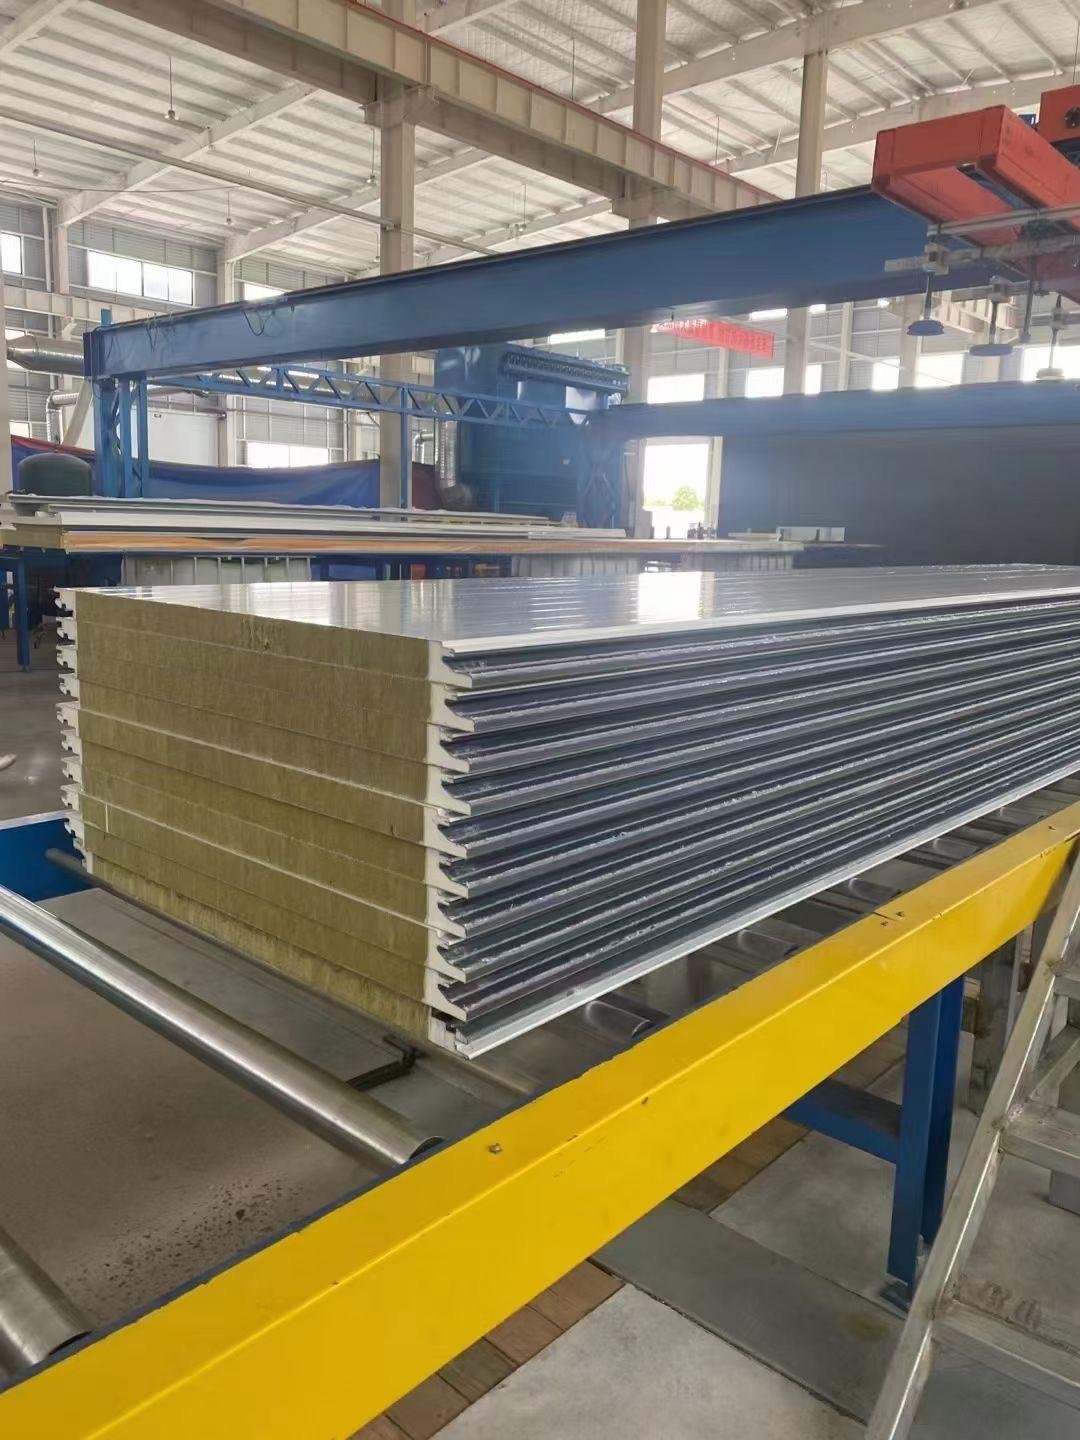
This method is great for making many panels quickly. Raw materials move through machines without stopping. The outer layers and core are cut, glued, and dried in one go. Machines like roll formers and curing ovens do the work. This process makes panels fast and with the same quality every time.
Tip: Use continuous production for big projects like factories or warehouses.
Benefits of Continuous Production
Fast Process: Panels are made quickly without delays.
Same Quality: Machines keep thickness and glue even.
Saves Money: Making many panels lowers the cost per piece.
Adjustable Speed: You can change speed to match project needs.
Discontinuous Production Method
How Discontinuous Production Works
This method is better for smaller jobs or custom panels. Each panel is made one at a time. Workers or machines put the core between the outer layers. Glue is added, and the layers are pressed together. After drying, the next panel is started. This method allows for special sizes and designs.
Note: Choose discontinuous production for small or unique projects.
Benefits of Discontinuous Production
Custom Designs: Make panels with special sizes or materials.
Cheaper Setup: Costs less than continuous production machines.
More Flexible: Easy to switch between designs or materials.
Better Checks: Each panel is checked for high quality.
Pick the method that fits your project size and needs. Both methods are important for making sandwich panels.
Quality Control for Sandwich Panels
Checking Materials
Inspecting Outer Layers and Core Materials
To make strong sandwich panels, check materials first. Look at the outer layers for dents, scratches, or uneven spots. These problems can weaken the panel. Use a ruler to see if the layers are flat. Bent layers may not stick well to the core.
Next, check the core material. Foam cores like polyurethane or polystyrene should be smooth and crack-free. Mineral wool must have even thickness and no loose fibers. Always confirm the materials match your project needs. Good materials make panels last longer and work better.
Tip: Keep materials in a dry, clean place to avoid damage.
Testing Finished Panels
Strength and Durability Checks
After making the panels, test their strength. Do a compression test to see how much weight they can hold. This shows if they are strong enough for building use. Also, do a bending test to check flexibility. A good panel won’t break or crack easily.
Heat and Sound Performance Tests
Panels for insulation need heat and sound tests. Use a thermal test to see how well the panel keeps heat in or out. Good insulation saves energy. For sound, test how well the panel blocks noise. This is important for schools, offices, and hospitals.
Note: Regular tests make sure panels are safe and work well.
Applications and Benefits of Sandwich Panels

Applications
Construction (e.g., walls, roofs, cold storage)
Sandwich panels are useful in many building projects. They work well for walls and roofs because they are light and strong. These panels keep temperatures steady, making them great for cold storage. Using them saves energy and lowers costs. They also make buildings safer by slowing down fires.
Transportation (e.g., vehicle bodies)
In vehicles, sandwich panels are used for body parts. Their light weight helps vehicles use less fuel. They are strong and can handle heavy loads, ensuring safety. Trucks, trailers, and special vehicles benefit from these panels’ strength and reliability.
Benefits
Lightweight and Durable
These panels are light but very strong. This makes them easy to move and install. They stay strong over time and work well in many uses.
Excellent Thermal and Acoustic Insulation
Sandwich panels keep heat in or out, saving energy. They also block outside noise, making spaces quieter. This is helpful for homes, offices, and schools.
Cost-effective and Easy to Install
Making sandwich panels is affordable and keeps quality high. Their light weight makes installation quick and easy. They save time and money for both big and small projects.
Tip: Keep sandwich panels in a dry place before using them. This keeps them in good condition.
Making sandwich panels needs the right materials and tools. First, get the core and outer layers ready. Then, stick them together with adhesive. Let them cure and test for quality. You can use continuous or discontinuous methods depending on your project.
Key Takeaway: Sandwich panels are strong, light, and insulate well. They are great for buildings, vehicles, and more.
Try using this smart material now. For small tasks or big projects, sandwich panels make designs better and save money.
FAQ
How can you make polyurethane sandwich panels stronger?
To make them stronger, apply glue evenly and press firmly. Use good-quality foam and strong outer layers like steel. Regular checks ensure the panels stay durable.
Is it possible to make sandwich panels at home?
Yes, you can make them at home for small tasks. Use simple tools like saws, glue rollers, and clamps. For bigger projects, professional machines work better.
How much time is needed to make a sandwich panel?
The time depends on the method used. Fast methods take minutes, while slower ones take hours. Drying and curing also add time.
Are sandwich panels good for the environment?
Yes, many panels use recyclable metals and low-pollution foam. Eco-friendly production methods make them a green choice for building.
What problems happen when making sandwich panels?
Problems include uneven glue, crooked layers, or bad materials. These make panels weak and less insulating. Careful checks and good tools prevent these issues.